Sunday, January 18, 2015

Monitor Field Node Version 2

 Sensor Field Node 2 got an upgrade to Version 2. The upgrade is a pretty decent size one. It includes the following:

  1. 3D printed enclosure
  2. Second temperature sensor to measure ambient air temps 
Version 2 components disassembled on top. Version 3(yet to be deployed) on bottom.
Version 2 is on the top. Version 3 on the bottom. Notice Version 3's ambient temperature hood compared to Version 2.
Plenty of room in the electronics bay.

Version 2's ambient temperature probe. Version 3 has a hood that covers the probe but still allows exposure to ambient air.

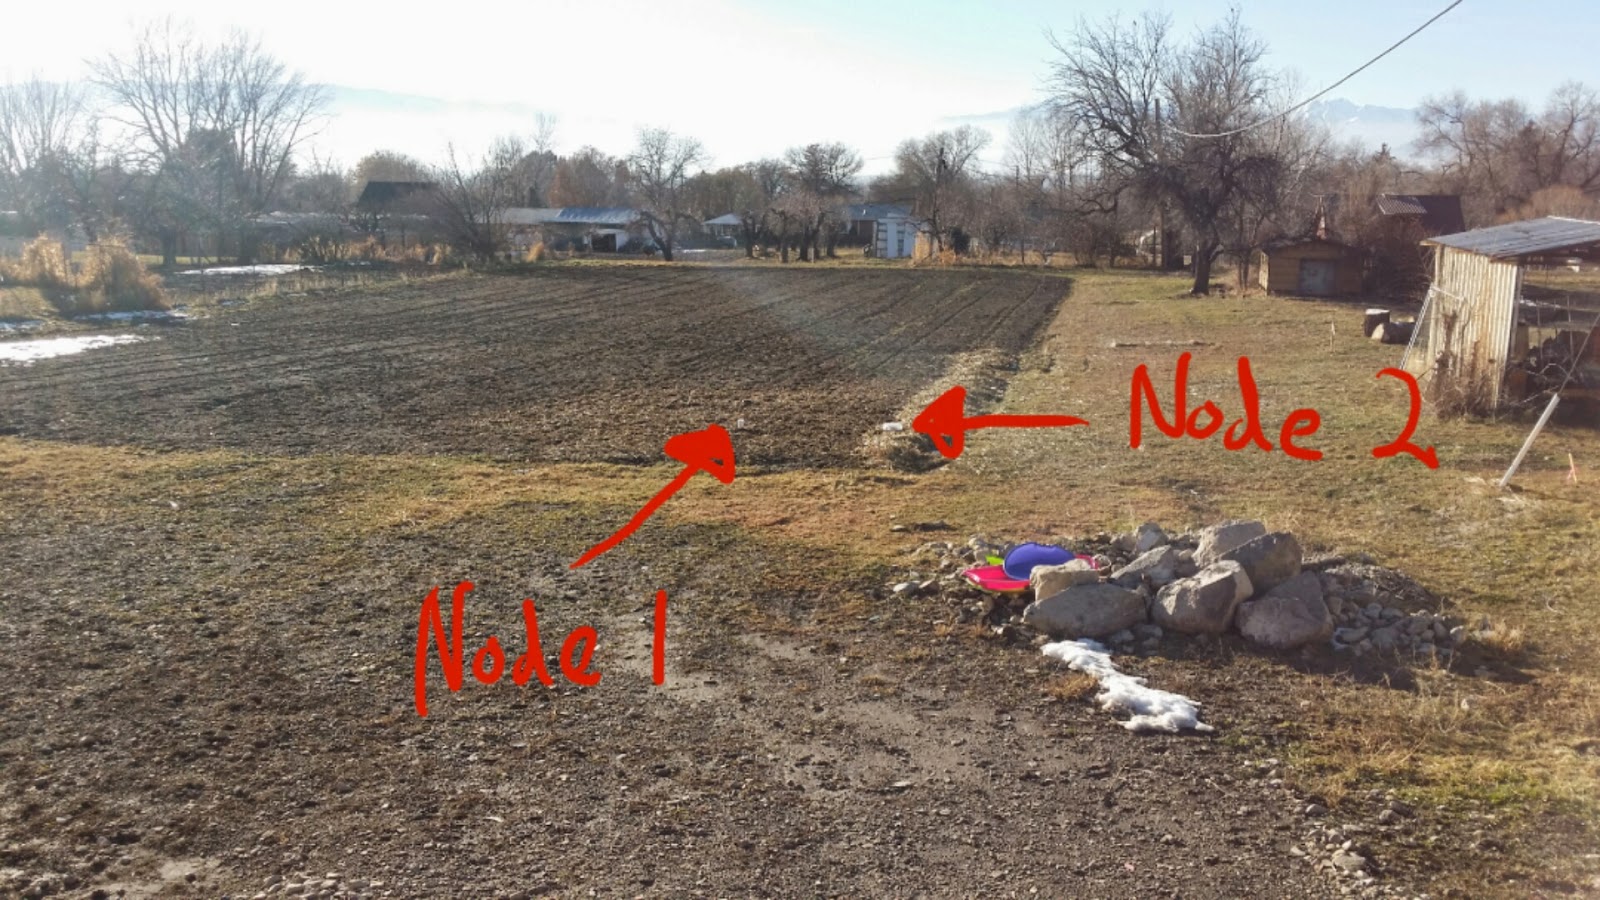
Nodes deployed in the field. Node 2 is still the "old school" plastic ziploc container. It will be getting an upgrade to Version 3 this week
Node 1 Version 2 by itself

The Nodes in the field all by themselves

 The enclosure is further getting refined and a new "skinner" form factor is on the horizon that reduces the volume electronics bay. See the temps here:  http://colby.securecomo.com/


Saturday, January 10, 2015

Monitor Node

We have a working Monitor Node with a temperature sensor that reports to a Mother Node. My buddy Dicky did some really EXCELLENT working on getting these going and implementing some great functionality.  It reports temperature right now. However, it will be expanded with more sensors in the near future. The solar powered Monitor Node is shown below.
Monitor Node
The Mother Node is wirelessly connected to the Monitor Nodes. The Mother Node then connects over wifi to my home network to upload the data to the internet.
Mother node
 The data, temp and voltage levels, from the Monitor Nodes can be seen here and here. I have 2 nodes and Dicky has 2 nodes. See below for some sample temp and voltage plots that were generated.
36 hour temp reading(*NOTE*the drop in Node 1 is moving from the inside our master bathroom to the garage)


Voltage data(*NOTE*, you can tell when the sun rises and the photo-voltaics are going )
My Monitor Node 1 is deployed in the garage and Monitor Node 2 is in field measuring soil temps near the garlic and  shallots.

See below, for Monitor Node 2 getting ready for the outdoors with some AWESOME outdoor water resistant packaging....... a plastic Ziploc container. Yes, that is rice being used as a desiccant, sprinkled very liberally by the way.
Monitor Node getting prepared for the outdoors
A cover and some RTV and we are ready to go!

Deployed  taking soil temps 2" down near the edge of the planted garlic mulch. 
Another deployed pic

Next steps, is to finish 3D printing the external packaging to ditch the awesome Ziploc plastic container. A preliminary go around ended like this. As you can tell it failed spectacularly.  Hopefully, today I will have a portion of the external packaging complete.
Failed external packaging 3D print


Saturday, January 3, 2015

A Slight Update

Well, I finally got to be able to walk on my foot again back in November; It was a long 3 months. In the mean time during those 3 months we harvested 36 Sweet Crimson watermelons for a total around 450lbs.


We also harvested some Jack of Lantern pumpkins, that barely matured in time for Halloween.
It was extremely mild for November and December here. We planted some Duganski and Susanville garlic cloves in November in addition to some Gray shallots. I had some little helpers that made it easier for me. I am really excited to try the Duganski garlic, it had a great "garlic'ly" smell.

The first skiff of snow happened on December 2nd, notice the hefty mulch for the garlic and shallots.

We also completed the garden survey basically measuring the field and relevant landmarks so we can do a proper layout for the vegetable garden, small orchard, strawberry and raspberry patches. The layout is approximately 50% complete and the 1st draft should be completed around the end of next week. That is it for now. However, we have some exciting things coming up that we'll talk about soon.

Sunday, September 14, 2014

The Monitor.......


In light of my broken foot, I have decided to tackle a project of a wireless field monitoring, I am going to start small and focus just on the monitor nodes. However, Figure 1 does so the overall plan including the monitor node, mother node and water solenoid node.
Figure 1: The big plan
The big plan has them all working together. The monitor node reporting the health of the field to the mother node. The mother node making the decision that affect the field such as irrigation based on the monitor node(s) reported information and external weather related data.  The mother node would then communicate to the water solenoid node to open or close as needed.

 Show in Figure 2 below, is the monitor node which will have the following sensors to report key field parameters.
Figure 2: Monitor node diagram

  • Light intensity sensor
  • Air temp sensor
  • Soil temp sensor
  • Soil moisture sensor 

The monitor will also have the ability to communicate wirelessly. Ultimately, the wireless connectivity will be used to communicate to other nodes and to a mother node. The input list that was previously posted is for the monitor node. That will have another revision coming fairly soon.

I will be crafting the the soil moisture sensor first, followed by the soil temp node, air temp node, and light intensity node.


Tuesday, September 9, 2014

Monitor node inputs

This is the 1st draft of the inputs sheet for the wireless garden sensor for the external lab space.  This can be revised as needed. Nothing in this is set in stone yet.

The ACRE LAB
PROJECT INPUT SHEET REV 01

Project: Monitor node
Revision: 01
Prepared by: Crank
Date: 08/19/14

Input #
Inputs
Specifications
Origin
1.1
Microcontroller shall be open source supported
·         Arduino
Usability
1.2
All source software shall be open source
·         Arduino IDE
·         GPL License
·         Software
Usability
2.1
Sensor shall take temp readings with +-1⁰C resolution
·         TMP36 
Function
2.2
Sensor shall take adequate moisture readings
·         The Acre Lab Soil Moisture Sensor V1
Function
2.3
Sensor shall take adequate light readings in  W/m2
·         Adafruit TSL2561 Digital Luminosity/Lux/Light Sensor Breakout
Function
2.4
Sensor battery charge shall last at least 31 days
·         Arduino clock @ 8mhz
·         2000mAH battery
·         Low-power libraries
·         Microcontroller sleep mode
Function
2.5
Sensor will have remote port to aid in battery charging
·         Access to outside of housing
Function
2.6
Sensor will be water resistant to typical environmental factors during typical use
·         Water resistant housing
·         RTV seals on interface joints
·         Battery charging plug

Function
2.7
Sensor will communicate wirelessly in an unlicensed radio band
·         NRF240L+1 Wireless Module
Function
2.8
Sensor will communicate readings at least every 10 minutes
·         Software
Function
1.3
Sensor shall be placed with a single hand and no additional tools
·         2 prong smooth design
Usability
1.4
Sensor shall be removed with a single hand and no additional tools
·         2 prong smooth design
Usability
1.5
Sensor shall withstand a fall from at least 3 ft and not break the outer housing
·         Nylon external housing
Usability
1.6
Sensor shall withstand a fall from at least 3 ft and still function as intended
·         Nylon external housing
·         Electronic wiring robustness
Usability
1.7
Sensor shall withstand temperatures at least ranging from -20⁰C to +50⁰C
·         Electronics
Usability
2.9
Sensor shall be retained in the ground and not fall over during typical use in typical environmental conditions
·         2 prong smooth design
Function
2.10
Sensor shall be able to communicate with other sensors
·         Software
·         NRF240L+1 Wireless Module
Function
2.11
Sensor range shall be at least 100ft in no obstacles operating condition
·         NRF240L+1 Wireless Module
Function
3.1
Sensor cost shall not cost more than $20
·         Arduino IDE
·         GPL License
·         Software
·         NRF240L+1 Wireless Module
·         2000mAH battery
·         Adafruit TSL2561 Digital Luminosity/Lux/Light Sensor Breakout
·         The Acre Lab Soil Moisture Sensor V1

Broken Foot

Well, I hoping to get more done on the labs; however, fate had a different idea. A couple of Sundays ago while walking some table scraps out the compost, I broke my foot. Nothing cool, just rolled my foot in a furrow, and snap, crackle, pop..... broken bones.  Yes, you CAN break bones while gardenting. So, needless to say I have not got much done on the labs, and I am on crutches and non weight bearing till November.  So, I guess it is time to get to designing.

Wednesday, August 20, 2014

What is the Acre Lab?

So, what is the Acre Lab? It consists of  two lab spaces, an external lab and internal lab. The external lab consists of approximately 0.9 acres and will house the garden, livestock, and other related items. See Figures 1 and 2 below.

Fig 1: External lab space
Fig 2: Internal lab space


The internal lab space consists of a couple of 3D printers, soldering iron, etc.... The stuff that I will need for bringing the technological aspect to the Acre Lab. During the cold Utah winters, I will spend most of my free time in the internal lab space developing projects to deploy in the external lab that follow spring.  Right now, that list of projects is quite long:

  • Chicken Coop
  • Rabbitery
  • Garden vitals monitoring system
  • Better composting system
  • Better irrigation system
  • 2015 Garden Plan
  • Growing my own plant starts
So, as I go along with these projects I will update them here.

The history behind the Acre Lab is that the ground has been within my family for generations. My grandfather and grandmother grew a garden on this land and another adjoining piece of land for decades. I hope to do the same on this portion. I want to leverage tools or create tools that were not available to them to increase the quality of crops and the ease of gardening. I also want to pass along the love of working the land to my own children.