Well, that is it for now.
Showing posts with label arduino hometeading. Show all posts
Friday, March 6, 2015
The Monitor Node Update
Well, the Monitor Node design is in the process of getting upgraded with an integrated humidity sensor and a custom PCB.
The PCBs, a quanity of 3, just showed up from OSH Park today we'll see if it works. I have also been playing with rough prototype moisture sensor. One that can be deployed will be completed in about 2 weeks after I get the nodes upgraded.
Well, that is it for now.
Sunday, January 18, 2015
Monitor Field Node Version 2
Sensor Field Node 2 got an upgrade to Version 2. The upgrade is a pretty decent size one. It includes the following:
The enclosure is further getting refined and a new "skinner" form factor is on the horizon that reduces the volume electronics bay. See the temps here: http://colby.securecomo.com/
- 3D printed enclosure
- Second temperature sensor to measure ambient air temps
![]() |
| Version 2 components disassembled on top. Version 3(yet to be deployed) on bottom. |
![]() |
| Version 2 is on the top. Version 3 on the bottom. Notice Version 3's ambient temperature hood compared to Version 2. |
![]() |
| Plenty of room in the electronics bay. |
![]() |
| Version 2's ambient temperature probe. Version 3 has a hood that covers the probe but still allows exposure to ambient air. |
![]() |
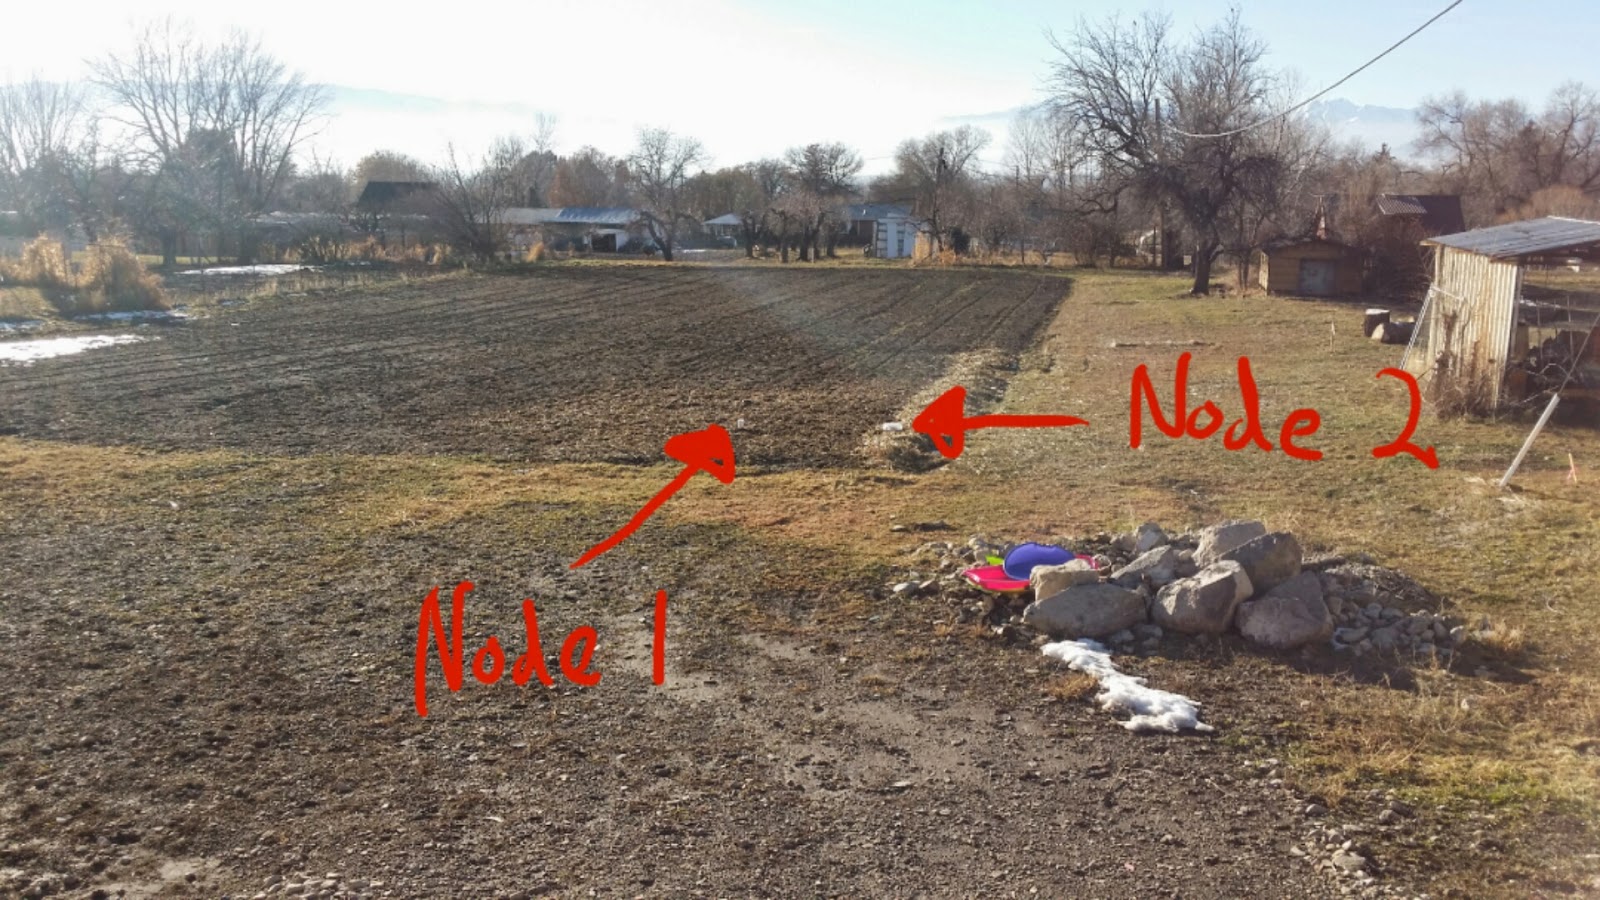
| Nodes deployed in the field. Node 2 is still the "old school" plastic ziploc container. It will be getting an upgrade to Version 3 this week |
![]() |
| Node 1 Version 2 by itself |
![]() |
| The Nodes in the field all by themselves |
The enclosure is further getting refined and a new "skinner" form factor is on the horizon that reduces the volume electronics bay. See the temps here: http://colby.securecomo.com/
Saturday, January 10, 2015
Monitor Node
We have a working Monitor Node with a temperature sensor that reports to a Mother Node. My buddy Dicky did some really EXCELLENT working on getting these going and implementing some great functionality. It reports temperature right now. However, it will be expanded with more sensors in the near future. The solar powered Monitor Node is shown below.
The data, temp and voltage levels, from the Monitor Nodes can be seen here and here. I have 2 nodes and Dicky has 2 nodes. See below for some sample temp and voltage plots that were generated.
My Monitor Node 1 is deployed in the garage and Monitor Node 2 is in field measuring soil temps near the garlic and shallots.
See below, for Monitor Node 2 getting ready for the outdoors with some AWESOME outdoor water resistant packaging....... a plastic Ziploc container. Yes, that is rice being used as a desiccant, sprinkled very liberally by the way.
Next steps, is to finish 3D printing the external packaging to ditch the awesome Ziploc plastic container. A preliminary go around ended like this. As you can tell it failed spectacularly. Hopefully, today I will have a portion of the external packaging complete.
![]() |
| Monitor Node |
The Mother Node is wirelessly connected to the Monitor Nodes. The Mother Node then connects over wifi to my home network to upload the data to the internet.
![]() |
| Mother node |
![]() |
| 36 hour temp reading(*NOTE*the drop in Node 1 is moving from the inside our master bathroom to the garage) |
![]() |
| Voltage data(*NOTE*, you can tell when the sun rises and the photo-voltaics are going ) |
See below, for Monitor Node 2 getting ready for the outdoors with some AWESOME outdoor water resistant packaging....... a plastic Ziploc container. Yes, that is rice being used as a desiccant, sprinkled very liberally by the way.
![]() |
| Monitor Node getting prepared for the outdoors |
![]() |
| A cover and some RTV and we are ready to go! |
![]() |
| Deployed taking soil temps 2" down near the edge of the planted garlic mulch. |
![]() |
| Another deployed pic |
Next steps, is to finish 3D printing the external packaging to ditch the awesome Ziploc plastic container. A preliminary go around ended like this. As you can tell it failed spectacularly. Hopefully, today I will have a portion of the external packaging complete.
![]() |
| Failed external packaging 3D print |
Sunday, September 14, 2014
The Monitor.......
In light of my broken foot, I have decided to tackle a project of a wireless field monitoring, I am going to start small and focus just on the monitor nodes. However, Figure 1 does so the overall plan including the monitor node, mother node and water solenoid node.
![]() |
| Figure 1: The big plan |
Show in Figure 2 below, is the monitor node which will have the following sensors to report key field parameters.
![]() |
| Figure 2: Monitor node diagram |
- Light intensity sensor
- Air temp sensor
- Soil temp sensor
- Soil moisture sensor
The monitor will also have the ability to communicate wirelessly. Ultimately, the wireless connectivity will be used to communicate to other nodes and to a mother node. The input list that was previously posted is for the monitor node. That will have another revision coming fairly soon.
Subscribe to:
Posts (Atom)